A couple of months ago my sister's dog, Tyler, passed away. His health had been not so great over the last few months. The last time we saw him was the first weekend in March, and he was moving slowly. It appeared he was also deaf and blind. My sister loves her fur babies and she is always willing to move mountains for them, but there was nothing left to do for him.
I wanted to do something for my sister that would show how much I grieved with her. She posted this photo of him in his younger days on Facebook the day he died:
I'm not going to reinvent the wheel here and give a full-blown tute; there are plenty of them out there on the interwebs--have a look and take your pick. Here are some I found and have used bits and pieces of what they've shared:
What I will do is show you a bit of my process. I had a fairly clear idea of what I wanted to achieve with this project. I imported the photo into PSE14 and posterized the image to allow me to make a pattern for applique, sizing the image that was roughly the size of an 8.5" x 11" sheet of paper.
 |
| Posterized image of Tyler |
I traced the parts onto freezer paper and once I started cutting the pieces, decided that it was too small. I resized the image by 150% and felt much better about it.
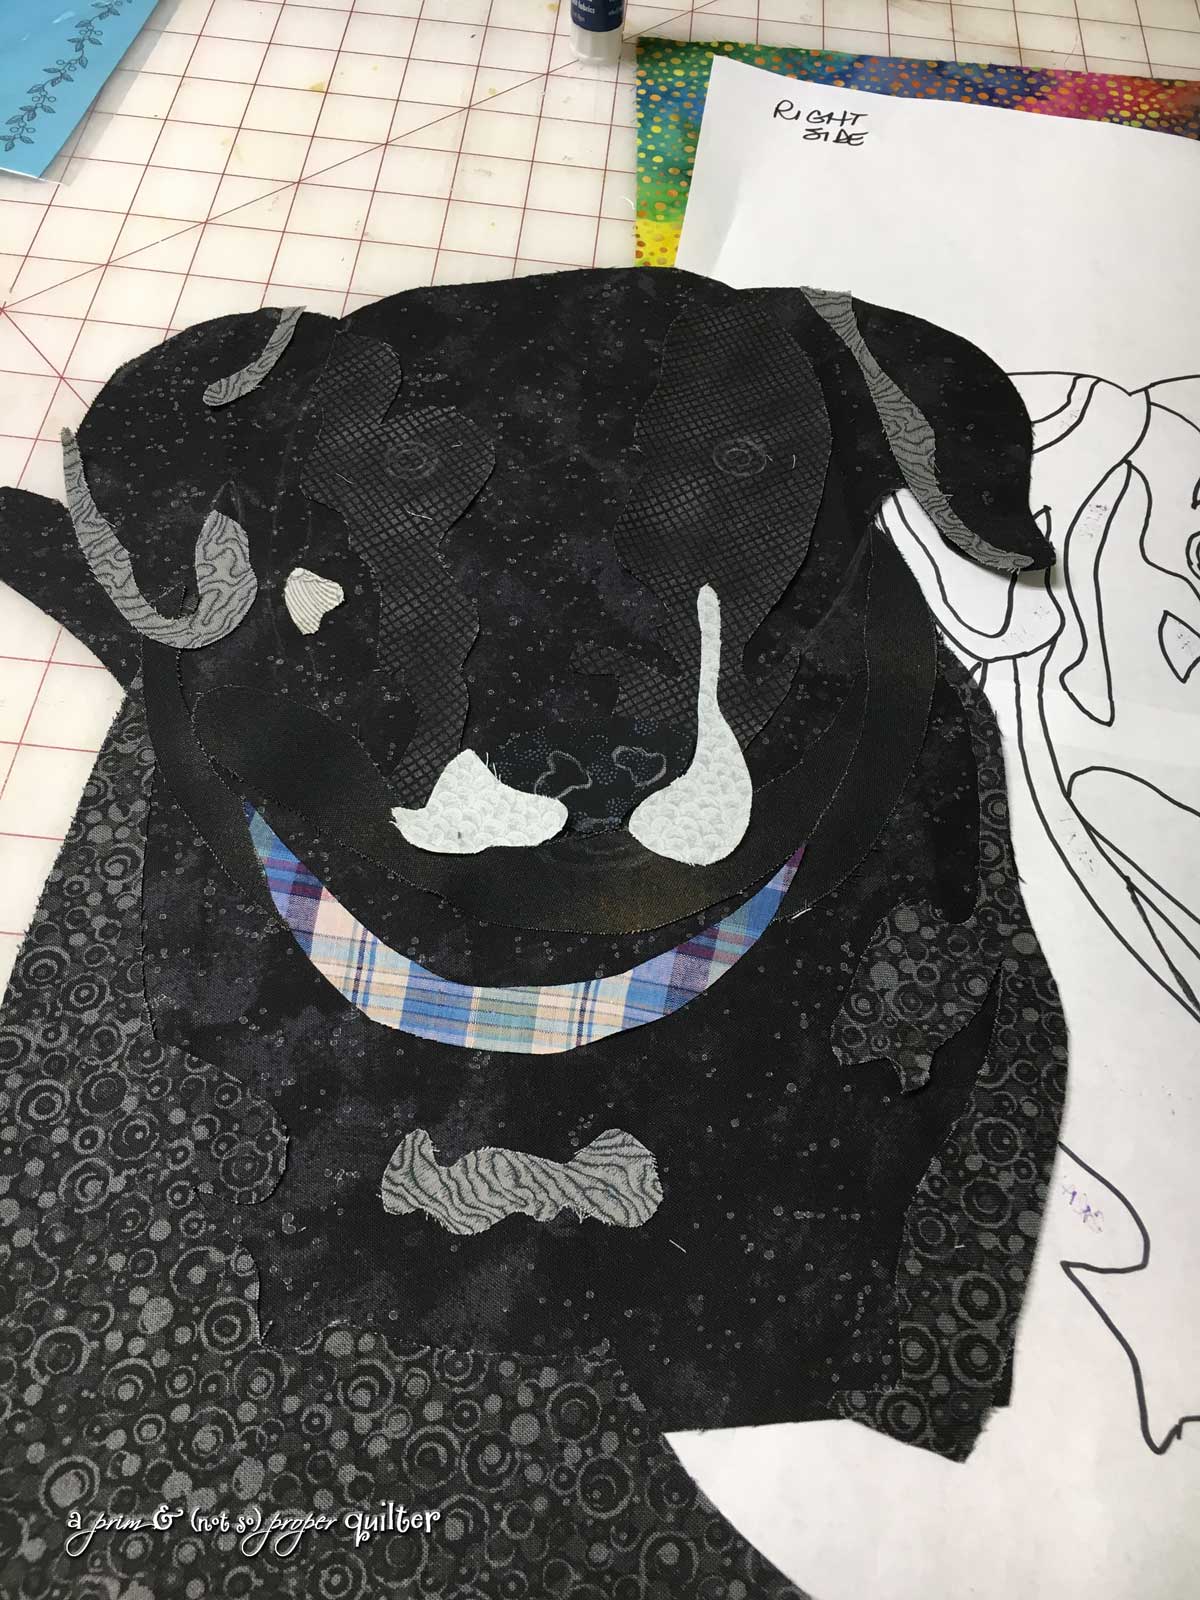
I shopped in my stash for all of the fabrics. After auditioning and selection, I adhered the freezer paper shapes to the wrong sides of the fabrics and cut them out with a seam allowance. I started to turn under the fabric edges but due to the crazy shapes, decided that wouldn't work either, and trimmed off the seam allowances.
After I glued the pieces in place, I wasn't so sure about the gray on the lower sides of Tyler.
I wanted contrast between the black and the gray, but this almost seemed too much contrast.
Newp.
That works.
I drew in the mouth and eyes, etc. After I had everything in place, I had to decide on whether to applique the entire piece on the background, or start the applique and thread painting on Tyler and then applique him to the background.
I decided to work on Tyler first, then applique him to the background. I fused him to some stabilizer, and practiced a little bit on a piece of muslin with a stabilizer underneath. I fiddled with the tension and got to a place I liked, and even remembered to write down my settings! And then I remembered that The Beast can save that setting--bonus!
I used Wonderfil Invisafil 100wt thread on top and Superior Threads Bottom Line 60wt in the bobbin. I started out by using the Vari-Lock stitch (#3) on The Beast, but decided that was overkill since there would be a little bit of thread painting over the applique stitches. I changed over to a straight stitch to applique and all was well.
I finally sat down to do the thread painting (Isacord polyester 40wt) on Mother's Day. I spent a blissful 4 hours just winging it, and it was so enjoyable. Here are some progress shots:
 |
| Getting Tyler positioned for applique... |
 |
| First pass with Pewter thread |
 |
| Addition of Black and Brown threads, and eyes |
 |
| One eye outlined... |
 |
| Detail for recess of the eyes |
The eyes...lots and lots of detail work and although it went fairly quickly, it was hard to determine a stopping point; but I stopped when I realized that I might do more damage than enhancement! And upon closer scrutiny, some of the detail was due to the flash reflection of the photo, and probably should not have been included. But it's done!
 |
| Satin stitch for the collar and to applique to the background fabric |
One thing I learned is that I didn't use enough glue. There are some little bumps here and there, but they quilted out.
I used Isacord polyester thread for the thread painting, and a Microtex 80/12 needle. I used my #24 foot with the open toe so I could see where I was going.
The background is a very bright Hoffman batik that has a lot of rainbow colors, which I thought was completely right for this project.
This was an opportunity to practice free-motion quilting on The Beast. For detail quilting on Tyler, I used Isacord polyester thread. For the background, I used a variegated So Fine 40wt by Superior Threads. The borders were quilted with straight lines using Superior Threads Fantastico. Quilting this on The Beast told me I need lots more practice with the BSR!
 |
| Quilting Tyler, Day 1 |
 |
| View of the back, Day 1 |
I had to stop at this point to do some sewing for our son Jack's wedding to Sydney last Sunday. The day after the wedding was the beginning of our vacation, and I spent most of the day quilting Tyler, and installing the invisible zipper and sewing the seams of the pillow.
I decided to add some hardware to the finished product. I bought a parachute buckle and lobster clasps, and fashioned a partial collar for Tyler. I also added a dog tag:
And now it's complete.
I gave Steph the pillow when we arrived in Memphis on Thursday:
 |
That's Maggie on the bed (on her special bedspread). On the wall
is the quilt I made for Steph in 2015. |
She liked it!
Sometimes I think I say too much about my process, but it helps me. I completely threw myself into this project and had a ball with it. I have wanted to make a portrait quilt for quite some time, and when Tyler passed away, I decided to immediately do this instead of waiting until I had all the tools, knowledge, confidence, blah, blah, blah...I also had to put it aside a couple of times after I started it because LIFE got in the way. And that's the way it is in my little world.
My point here is that if you want to do it, DO IT. Is this perfect? NO! But none of my quilts are and I'm completely fine with that thought. So, JUMP IN--GO QUILT!


You are an amazing quilt artist! Thank you for sharing.
ReplyDeleteBon, thanks so much. I want to do another project like this soon!
DeleteI just finished one of my dog, I also made a pillow. Yours is beautiful. Thanks for sharing
ReplyDeleteI would love to see yours! I still haven't made another one, but I do have the subject matter. Happy quilting!
DeleteThank you for posting this. I have 3 brown dogs and had no idea how to approach. This is so helpful
ReplyDeleteThanks so much! I really enjoy working in the portrait style. It takes me a while, but it's fun.
Delete