Finally Finished—the Down & Dirty Civil War Repro Quilt!
—the first finish of 2025 AND finished on Worldwide Quilting Day.
Goodness, where does the time go? It’s February March and I have a finished quilt to share with you! And talk about uplifting—let’s just say with all the happenings in our family circle and the world, it’s nice to see something get accomplished, although I honestly thought by this time I would have at least two quilts done. Anyone who truly knows me is laughing their butts off reading that statement.
I started this quilt in 2013 when our youngest, David, said he would like a quilt made with reproduction fabrics—he had hung out at the quilt shop long enough to know what they were, and he knew what my stash was made up of at the time (and let’s face it, it still takes up a large chunk of my stash due to the lack of getting things done during all those years). After working on the Tattoo quilt for over a year, it was nice to pull something out of one of The Bins that screamed, “Me! Pick me!” and I did. The fact that it coincided with David and Emma’s move to their new home AND Emma’s birthday was icing on the cake.
This is what I had envisioned all those years ago:
 |
| Draft of the quilt in Electric Quilt |
There wasn’t enough of the cornerstone/setting triangle fabric to make the corner triangles—I found a piece of fabric that was close enough, and also used it for the binding.
 |
| This is actually two photos--left and right sides of the magnetic hoop to position for the next motif stitch-out |
The quilting for the setting and corner triangles gave me some fits. I knew something had to go in them because of their size. I thought of a quick design—an arc starting on one side, moving into a circle in the center with an arc to the opposite side (kind of a riff on the egg and dart motif), but my FMQ skills need dusting off and some practice so I threw out that idea (and frogged what I already had attempted). I then decided to attempt to draw that design in my digitizing software. And that brings me to…
Muscle memory. When I purchased not one, but two different digitizing applications over the last few years I didn’t give much thought to a learning curve, because I started digitizing embroidery and quilting designs back in the late 1990s when I had my Pfaff 7570 and the PC-Creative Designer software…on a floppy disk…and I thought, how hard can it be? What I didn’t realize was how many advancements had been made in the area and let’s just say that I had information overload. I stared at the screens in both of the applications I have, and could not figure out which click did what. Back to deep diving in YouTube, I watched a couple of videos that got me going in the right direction, and did this:
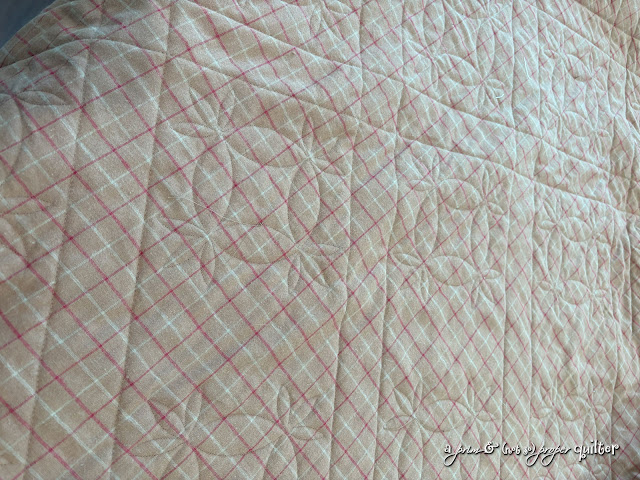
No, it’s not what I originally intended. I sort of went down a rabbit hole and remembered something about motifs. I found an orange peel design and took off from there; it’s the center portion of the design quilted in the 6” blocks. I started off in Hatch 3, but ended up in Embrilliance StitchArtist Level 1. I was able to digitize the orange peel design fairly quickly, and it took a couple of hours to stitch out all of the setting triangles.
Part of stitching out the design in the setting triangles included using a marking tool to draw x and y axis lines to aid in hooping the quilt. I will have a product review post soon about the Taylor Seville Magic White Marking Pen.
While struggling with the embroidery applications, I thought about how easily digitizing came to me almost 30 years ago—I had a husband, 3 kids and my mom all at home, worked full-time outside the home, and still managed to immerse myself in the software. I do believe some of the elasticity of the brain has gone bye-bye, and that has helped increase the learning curve for me. As a result, I have registered for a hands-on class with Lisa Shaw to learn more about Embrilliance StitchArtist--I'll let you know how it goes.
I hand stitched the binding--it's not my normal process, and I'll discuss it in my product review post of the marking pen. But here's one of my buddies who loves to snuggle when a quilt is in my lap:
The backing is a brushed flannel by Andover from a very, very long time ago; probably around 2007. The quilting, while not so noticeable on the front in the 6” squares (and that’s ok by me), looks fabulous on the back. The thread is Superior Threads So Fine in 50 weight and Color #425 on top and in the bobbin. I love So Fine thread—it is now my go-to for piecing AND quilting.
 |
| The back of the quilt BEFORE I realized I missed some sashing and cornerstones. |
And most of this was done on The Beaut, my Bernina 790 Plus. I love this machine. When I started this in 2013, I was using my Pfaff 7570.
Dave and Emma came over last Monday and I surprised them with the quilt. Dave even remembered his request for it!
I mentioned in a previous post that I needed to take my Brother Luminaire out of its luggage and start using it. It’s on the sewing table now, and I started the lessons a couple of weeks ago. The lessons include projects and I’m working on the first one, a tote bag with decorative stitching. I hope to wrap that up before I leave this week to head to Katrina’s to finally quilt the Tattoo quilt—WOOHOO!
More to come; in the meantime, go make!


Comments
Post a Comment